I will give you a quick recipe and a rundown of how we did it, in case anyone else wants to try this. It really is worth it, the pasta you get is so much fresher and tastier and the texture is amazing!
Here is a link to the recipe I used. It was from Allrecipes and looked like the best recipe that incorporated semolina. I have made tons of pasta before but never with semolina flour. For those of you that don't know, My boyfriend and I both took a year of culinary school and hope to be chefs some day. Well I hope to run my own bakery but he wants to be a chef. One class I took was teaching us to make large volumes of food for catering and whatnot, and I spent many days in that class making piles and piles of fresh pasta to sell in the school restaurant as lasagna. Anyways, on to the recipe.
Ingredients:
2cup semolina flour
2cups all purpose flour
6 large eggs
2tbsp oil
Pasta roller/cutter (optional use rolling pin and knif e otherwise)
Stand mixer with dough hook attachment (also optional, but makes 10 minutes of kneading way easier!)
Now for the instructions. I took a lot of pictures of this for you guys, but please be kind since my kitchen is extremely small and kind of messy. I did my best to keep clutter out of the pictures, but it was hard!
The first thing to do is put all of the flour and salt in your mixing bowl and make a well in the centre of it. If not using a stand mixer to this on a lat clean surface with no bowl, just pile on the flour and make a well for the wet ingredients in the middle. Next crack the eggs into the middle and add the oil.

Next mix the ingredients together with the paddle attachment slowly until it starts to form a ball. If using the tabletop method, use a fork and slowly start mixing from the centre occasionally pulling in flour from the edges. If you are doing it this way you will eventually have to switch to using your hands. This is what it should look like:


Ok now it is time to knead! If your dough looks any drier than mine at this point add a few extra drops of oil. Next add the dough hook arm to your mixer, or get ready for a serious workout! You need to knead this for about 8-10 minutes on a medium low setting. As you knead it it should start to soften up and get somewhat elastic feeling. It should look like this:

Then, wrap it tightly in plastic wrap and let sit at room temperature for 30 minutes. If it is still feeling hard after the 30 minutes leave it a bit longer. You want it to soften up a lot while it sits.

At this point we normally start making our pasta sauce while we wait. I completely forgot to take pictures of this part. I have a really easy from scratch recipe for a spaghetti meat sauce that I have made and I will include it at the end since that is what we made.
Ok once the dough is ready it is time to start rolling it out. You want to break off smaller hand sized pieces from your big dough ball to work with and keep the rest tightly wrapped so it doesn't dry out. Set up the pasta roller and dust the top of it with a little bit of semolina flour to keep the pasta from sticking in it.

To start set the pasta roller to the largest setting, which should be number 1. flatten your hunk of dough slightly and feed it through the machine. Fold in half and feed it through on the same setting for a few times. Now change the setting to 2 and feed it through once, each time making the size 1 number smaller. Eventually it should start looking like this:

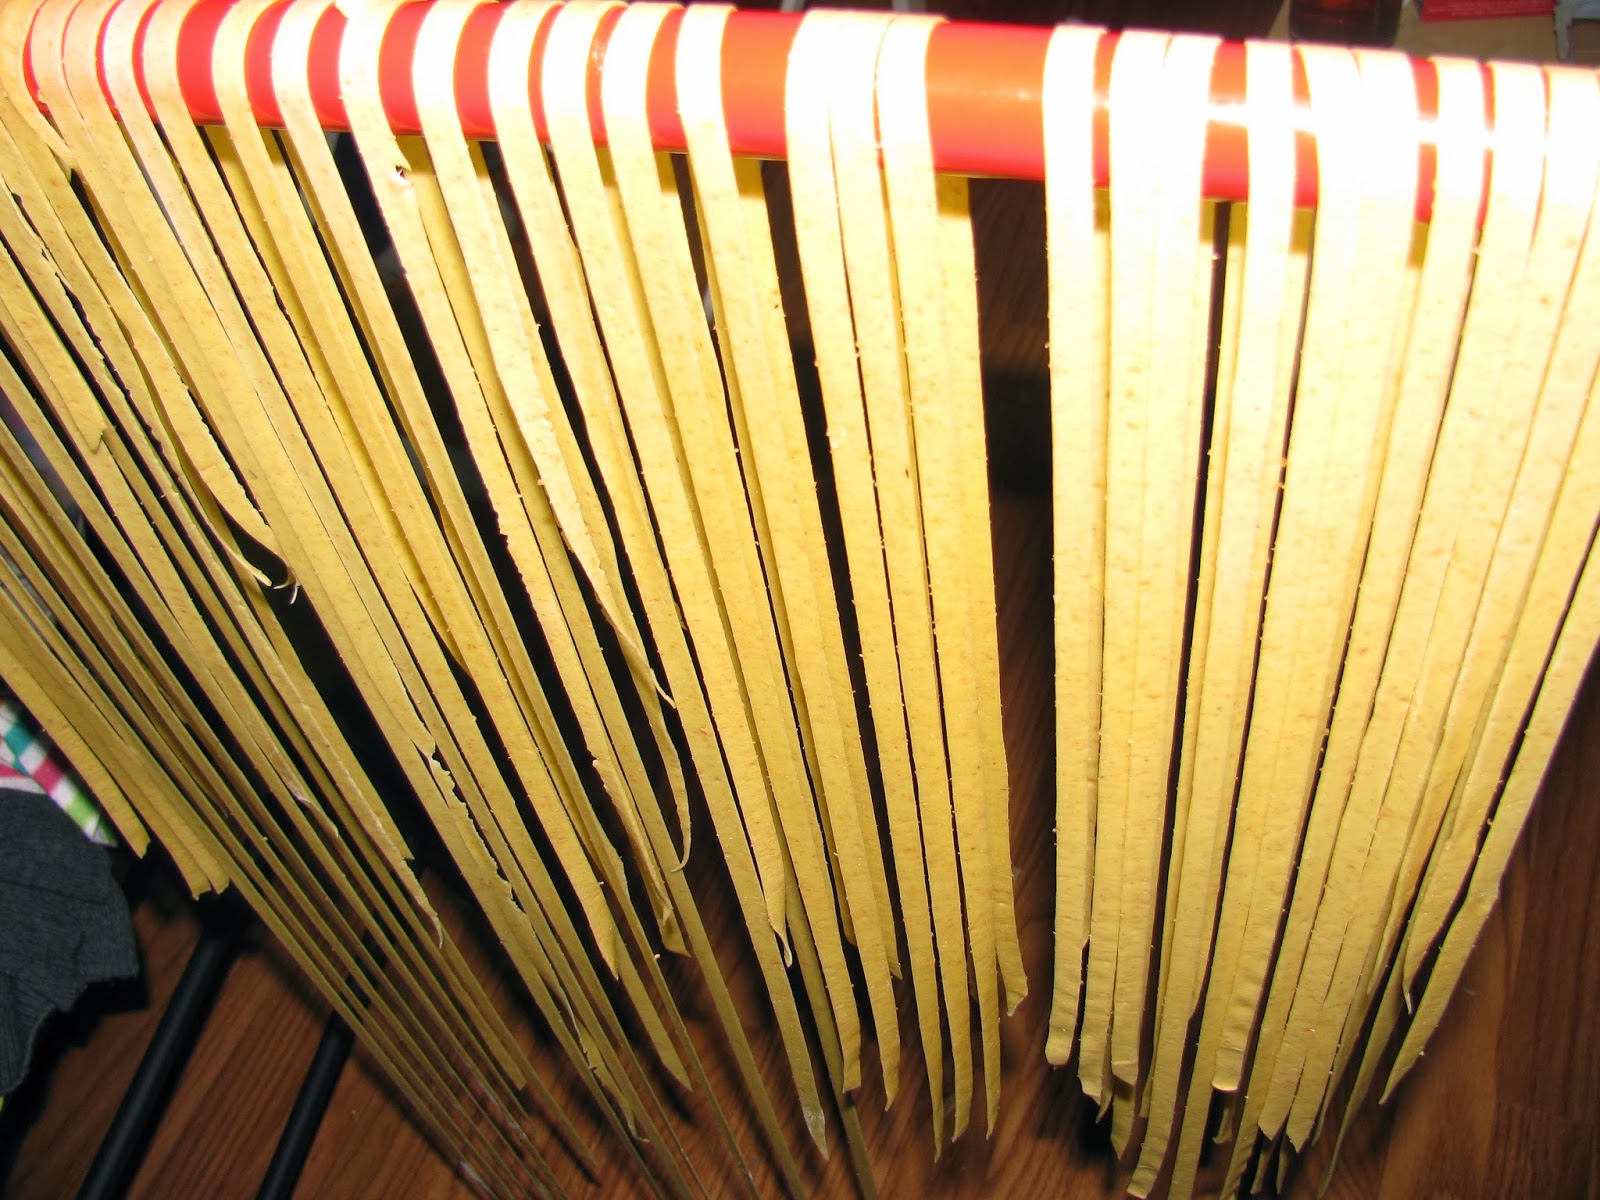
Once you have reached the thickness that you want cut the pasta sheet to the lengths you want and feed it through your pasta cutter attachment. We stopped at #6, which is still quite thin. We decided to try the linguini cutter. I also got a spaghetti cutter but we thought we had made it too thin for that. After cutting it we laid it all out on a clean broom handle that was across 2 chairs.
We cooked some of this pasta almost immediately for dinner, which only took about 1 minute dropped into boiling water. The rest we left to dry until they were less sticky but still bendy. Then we formed them into little nests for storing and left them on a plate to dry completely.
Now for a really simple pasta sauce!
Ingredients:
1 can crushed tomatoes, 1 can diced tomatoes (I prefer no salt added varieties)
1 onion, diced
3 cloves of garlic, minced
1lb ground beef
2 Bay leaves
Oregano, Rosemary, Thyme, red chili flakes
Salt, pepper
If you are looking for a vegetarian version add more onion, as well as carrot and red pepper instead of the beef.
Fry the onion and garlic in a frying pan until lightly browned then add the ground beef. While that is cooking pour the cans of tomatoes into a big pot and add all the spices. When ground beef looks mostly cooked add the contents of the frying pan into the tomatoes. Bring to a boil and then turn down to low heat and let simmer for 30 minutes. That is it, a very easy meat sauce!

So, that was it for my recipe! I hope you enjoyed it and will maybe give it a try!
Wow, reading this post while I'm hungry wasn't the smartest idea! This looks really good, and I love that it's homemade pasta!
ReplyDeleteThanks hun!
DeleteOH. MY. GOODNESS. This looks amazing! I remember my Nonna used to make pasta like this....you may have just inspired me to try it out! Have a Happy New Year! :)
ReplyDeleteUndeniably, me
If you try it, let me know how it goes! :)
Delete